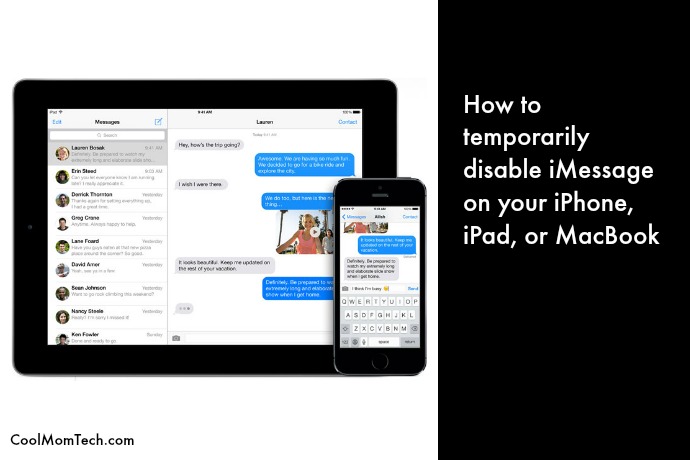
If you’re like me, you pretty much can’t live without iMessage. And now that you can sync it between your iPhone or iPad and your MacBook, well, it’s like a communication dream come true. Except when you need to turn it off. The buzzes and beeps can be hugely distracting during important calls, and as much as I love it on my computer, it can often be hard to get work done with your iMessages popping up every few seconds.
So, I put together these simple tutorials for temporarily disabling iMessage on your iPhone, iPad, or computer.
How to disable iMessage on your iPhone or iPad
1. Of course, you can just turn iMessage off altogether, which you can do by going to Settings > Messages > iMessage off. However, that will force all your messages to text messages and won’t necessarily stop your phone from buzzing.
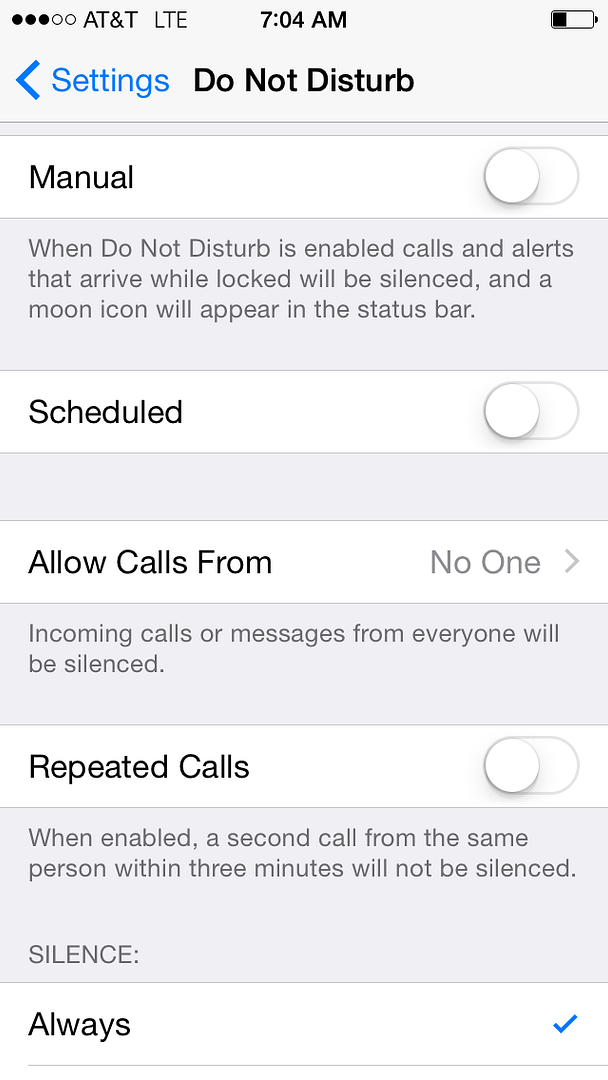
2. Instead of just an all-encompassing Do Not Disturb, you can program more specific rules. Go to: Settings > Do Not Disturb to set up your preferences.
You can choose whether you want specific numbers to get through, even in Do Not Disturb mode. (Like your kids. Or Bradley Cooper.) You can also specify if you’d like repeated calls — a second call from the same number in a three-minute time period. And then under “Silence” be sure to check “Always” rather than “Only while iPhone is locked.”
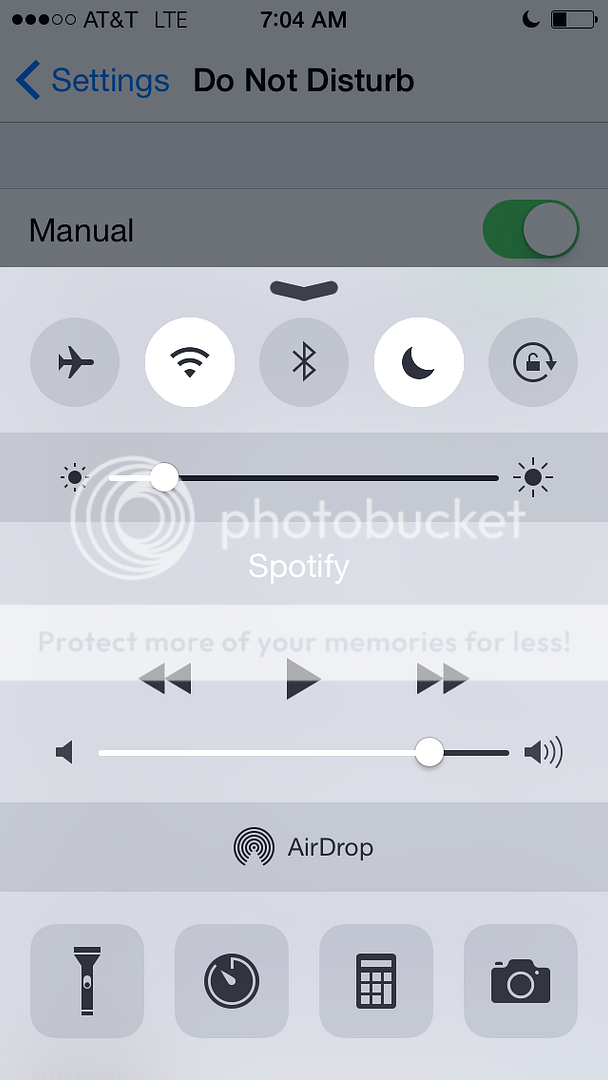
3. Now that you have your preferences set, you can simply turn on Do Not Disturb, which you can quickly access when you swipe up from the bottom to bring up your iPhone Control Center. Click the moon icon in the top row to activate it and you’re done until you turn it off again.
How to disable iMessage on your computer
Turning off iMessage on your iPhone or iPad, or putting it into Do Not Disturb mode does not turn iMessage off on your computer, so you will need to do that separately. I often disable it on my MacBook if I’m on a Google Hangout or Skype session, as well as when I’m working on a deadline and need to be completely free of distractions.
1. To turn off iMessage on your computer, click on your messages icon, which is the chat bubble, generally located in your dock, or you can find it in your Applications folder. This way your messages are open and visible.
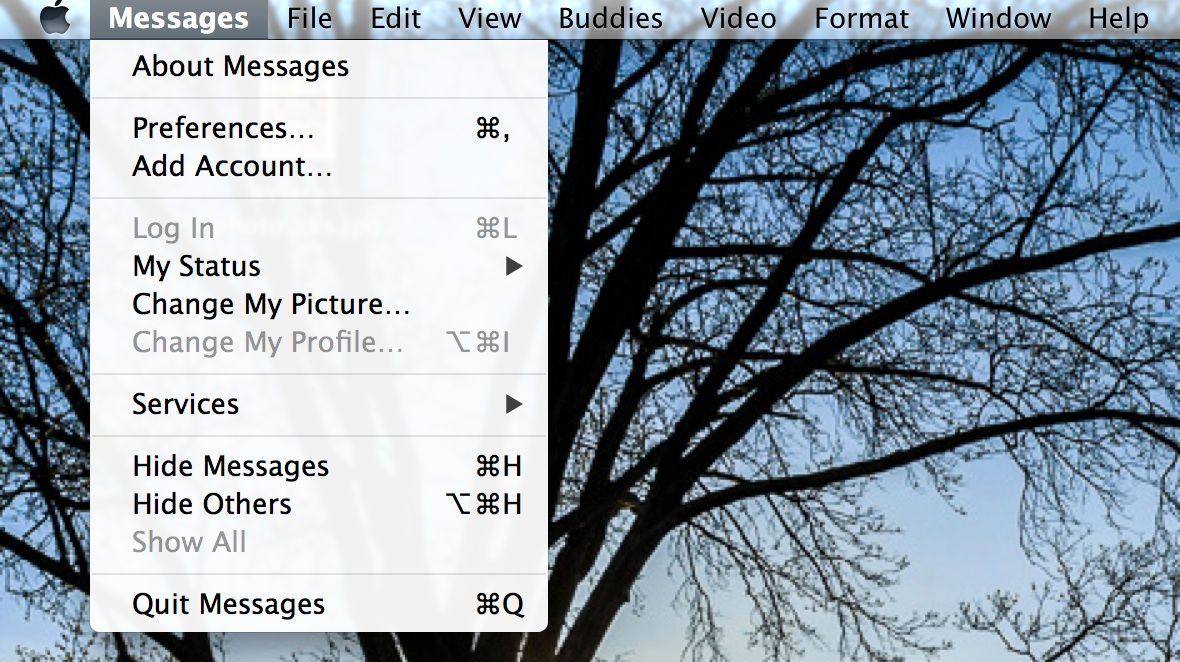
2. Open the Messages menu on your computer. If you don’t see it, be sure to click that messages icon so that your message box is the most front and center window. The Messages menu will then pop up on top of your screen.
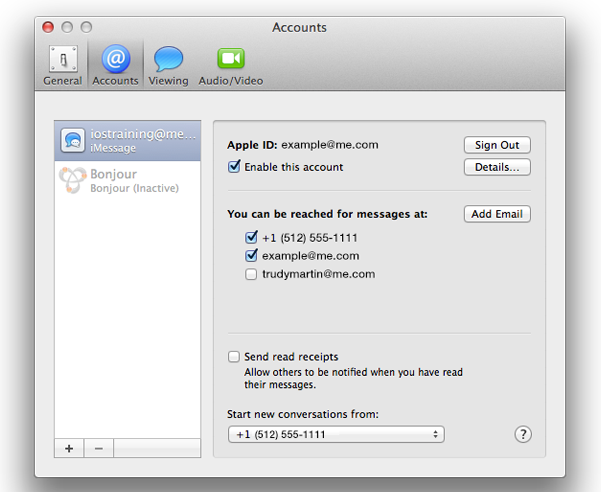
3. Click Preferences > Accounts Tab, which bring up a window like the one here. Click on your Apple ID and then uncheck the box next to “Enable this account.” You’ve now shut off iMessage.
To turn it back on, simply go back and put the check box back and resume your witty texting banter with all your friends and family.
For more helpful tech tips, make sure to check our archives.




Hi Kristen,
A cool mom needs to know this stuff as much as a mobile business person, I’m sure! I haven’t had a need so far, but I’m sure my clients will, so I’m trying out your instructions. It all worked fine except when I when to allow my son’s number to override the settings, that wasn’t one of the options. It’s all or nothing, everyone or all contacts or no one. This is not a good option for me. You? –Sally
I’m curious if doing this will completely stop iMessages from being delivered to the iPad or just stop the notifications? My sons school requires iPads but prohibits texting during school hoirs and the temptation is proving too great for him many times.